BCDC++ guide
Download and InstallationFirst, download the file from Here. It is distributed as a RAR file - the best application to open it with is Winrar (google for it).
No installation is required, extract the contents to where you want to run it from. Then click on the DCplusplus.exe file. Configuration information is stored in XML files, so backup/duplication is easy.
Settings - General
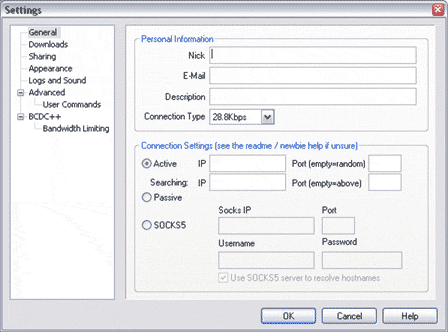
To start with, BCDC++ will force you to fill in the general options. All you need to get started is the nick field - what you want to call yourself. E-mail, description and connection type are all optional. We will come back to connection settings later, leave it on passive for now.
Settings - Downloads
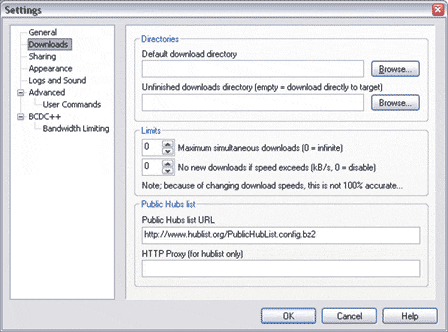
Downloads has a few options. You can choose the default directory you download to, and where you want to store downloads before they are complete.
More importantly, you can set how many downloads you can do at the same time (max simutaneous downloads) and a limit at which no more downloads will start so that you don't have loads all getting little speed. Ignore the public hubs if you intend to connect to out private hub.
Settings - Sharing
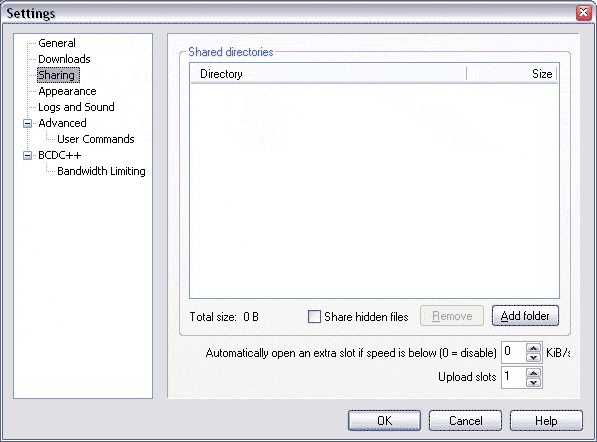
This is where you set what other people have access to. It also has the important number of upload slots (how many uploads can be going simutaneously) and whether to open another slot below a certain speed.
To add a share, click the add folder button. Use the dialog to select a folder and then click ok. Folders within the selected folder will also be shared.
Settings - appearance
Apperance lets you change how the interface looks and a few ways that it works. I have found no reason to change any.
Settings - logs and sounds
Does exactly what you expect. Select a logging directory and it will store the selected logs in there. I do not know what the format option means. You can also turn on sounds for private messages.
Settings - Advanced
The advanced menu has a lot more options. If you don't know what they do, don't mess with them - BCDC++ will work fine with the defaults. The user commands section allows you to create scripts that react and respond to situations you define.
Settings - BCDC
This menu is like Advanced - options you can change if you understand, otherwise leave alone.
Settings - BCDC - Bandwidth control
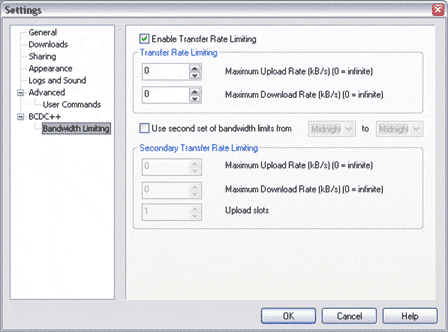
Bandwith control is the main reason for using BCDC++ over DC++. It allows you to limit upload and dowload speeds so that you can keep bandwith for other things, like other downloads, browsing etc.
What should it be set to? thats up to you. If you divide your connection speeds by 10, that is roughly the maximum you can get in a best case situation (usually its a bit less). For me, i am on 600/128. I have limited my upload to 10KB/s so i still have 2 or 3 for browsing. Download is limited to 30 so that i have half my connection for other things.
Connection
DC++ clients have two options to connect with. Passive is the default setting, and will work in nearly all situations. In passive mode, everything will work fine but you won't be able to download from other passive users and the hub will be doing all the search work. Active is superior but takes some network administration and settings.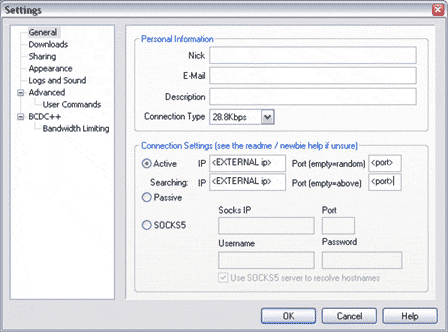
To run it active mode, you must put your external IP into the IP boxes. If you are running a home network, then it is the IP of the Router. If you are using just one PC, then you probably only have one ip.
To find an IP on a windows machine, use run-winipcfg on 98 and earlier computers, and select the right connection. In XP and 2000, run a command prompt (run-cmd) and type ipconfig. This will give you all the ips of all the connections on that PC.
For hardware routers, it is more complex.
Port
The port choice is up to you. It can be any port, but i strongly suggest above 1024 since it is unlikely to affect anything else. However, this port must be entirely open (TCP and UDP) - not blocked by a firewall. Methods for unblocking vary depending on the firewall/hardware router.
Also, the PC running the client must have the port routed to it. Once again, this is up to the firewall/hardware router configuration. This is how the external IP routs the connecton to you.
Connection to a private Hub
BCDC++ is setup to browse many public hubs. If you want to do this go ahead. However, this guide is to allow you to connect to our dedicated private hub so you can file share with your friends. First find the username and password you sent to Nuisance value. Then click on favorite hubs (View, 6th one down or on the toolbar)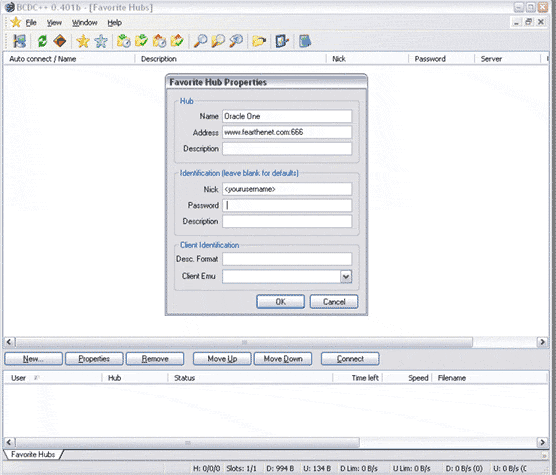
Click new and fill in these details. Put your username in nick and password in password. Then click ok, and click Oracle One in the list to connect to it. Congrats - you have just joined the hub !
Last modified: 01/06/2005


